
What you need before you start
- A Mac or Windows computer with a working microphone.
- Your Dibur license key, if you already received one.
- An internet connection for activation and the first speech-engine download.
Start with the download for your computer
If you have not obtained Dibur yet, open the official page below and follow its current purchase or access flow. If you already have a key, use the download page or the link you received. Keep the key available for first launch; you do not need to paste it into this guide.
On a phone right now? Open the same download page on the computer where you want Dibur to type. A Mac installer cannot run on Windows, and the desktop app does not install on an iPhone or Android phone.
On Mac: open the disk image and move Dibur to Applications
Check which Mac you have
Open the Apple menu at the top left and choose About This Mac. If it lists an Apple chip, choose the Apple Silicon download. If it lists an Intel processor, choose Intel. The download selector can offer a suggestion, but this screen confirms your hardware.
Open the downloaded file
In Finder, open Downloads and double-click the file ending in .dmg. A small window containing Dibur opens. A .dmg is a container used to deliver the app; opening it is not the final installation step.
Drag the Dibur icon to Applications
Wait for the copy to finish, then open Finder > Applications and double-click Dibur there. If macOS asks whether to open an app downloaded from the internet, check that this is the installer you obtained from Dibur and choose Open.
On Windows: run the installer
Find the Windows download
Open File Explorer > Downloads and double-click the Dibur file ending in -setup.exe. Follow the installer window until installation finishes, then open Dibur from the Start menu. The exact file version may change when a new release is published.
If Windows shows a SmartScreen warning
For the Dibur installer you deliberately downloaded through the official page, the current installation flow may show Windows protected your PC. Choose More info, check the application filename, then choose Run anyway. This is not an instruction to ignore a malware detection or to turn Windows protection off.

Open Dibur and activate your key
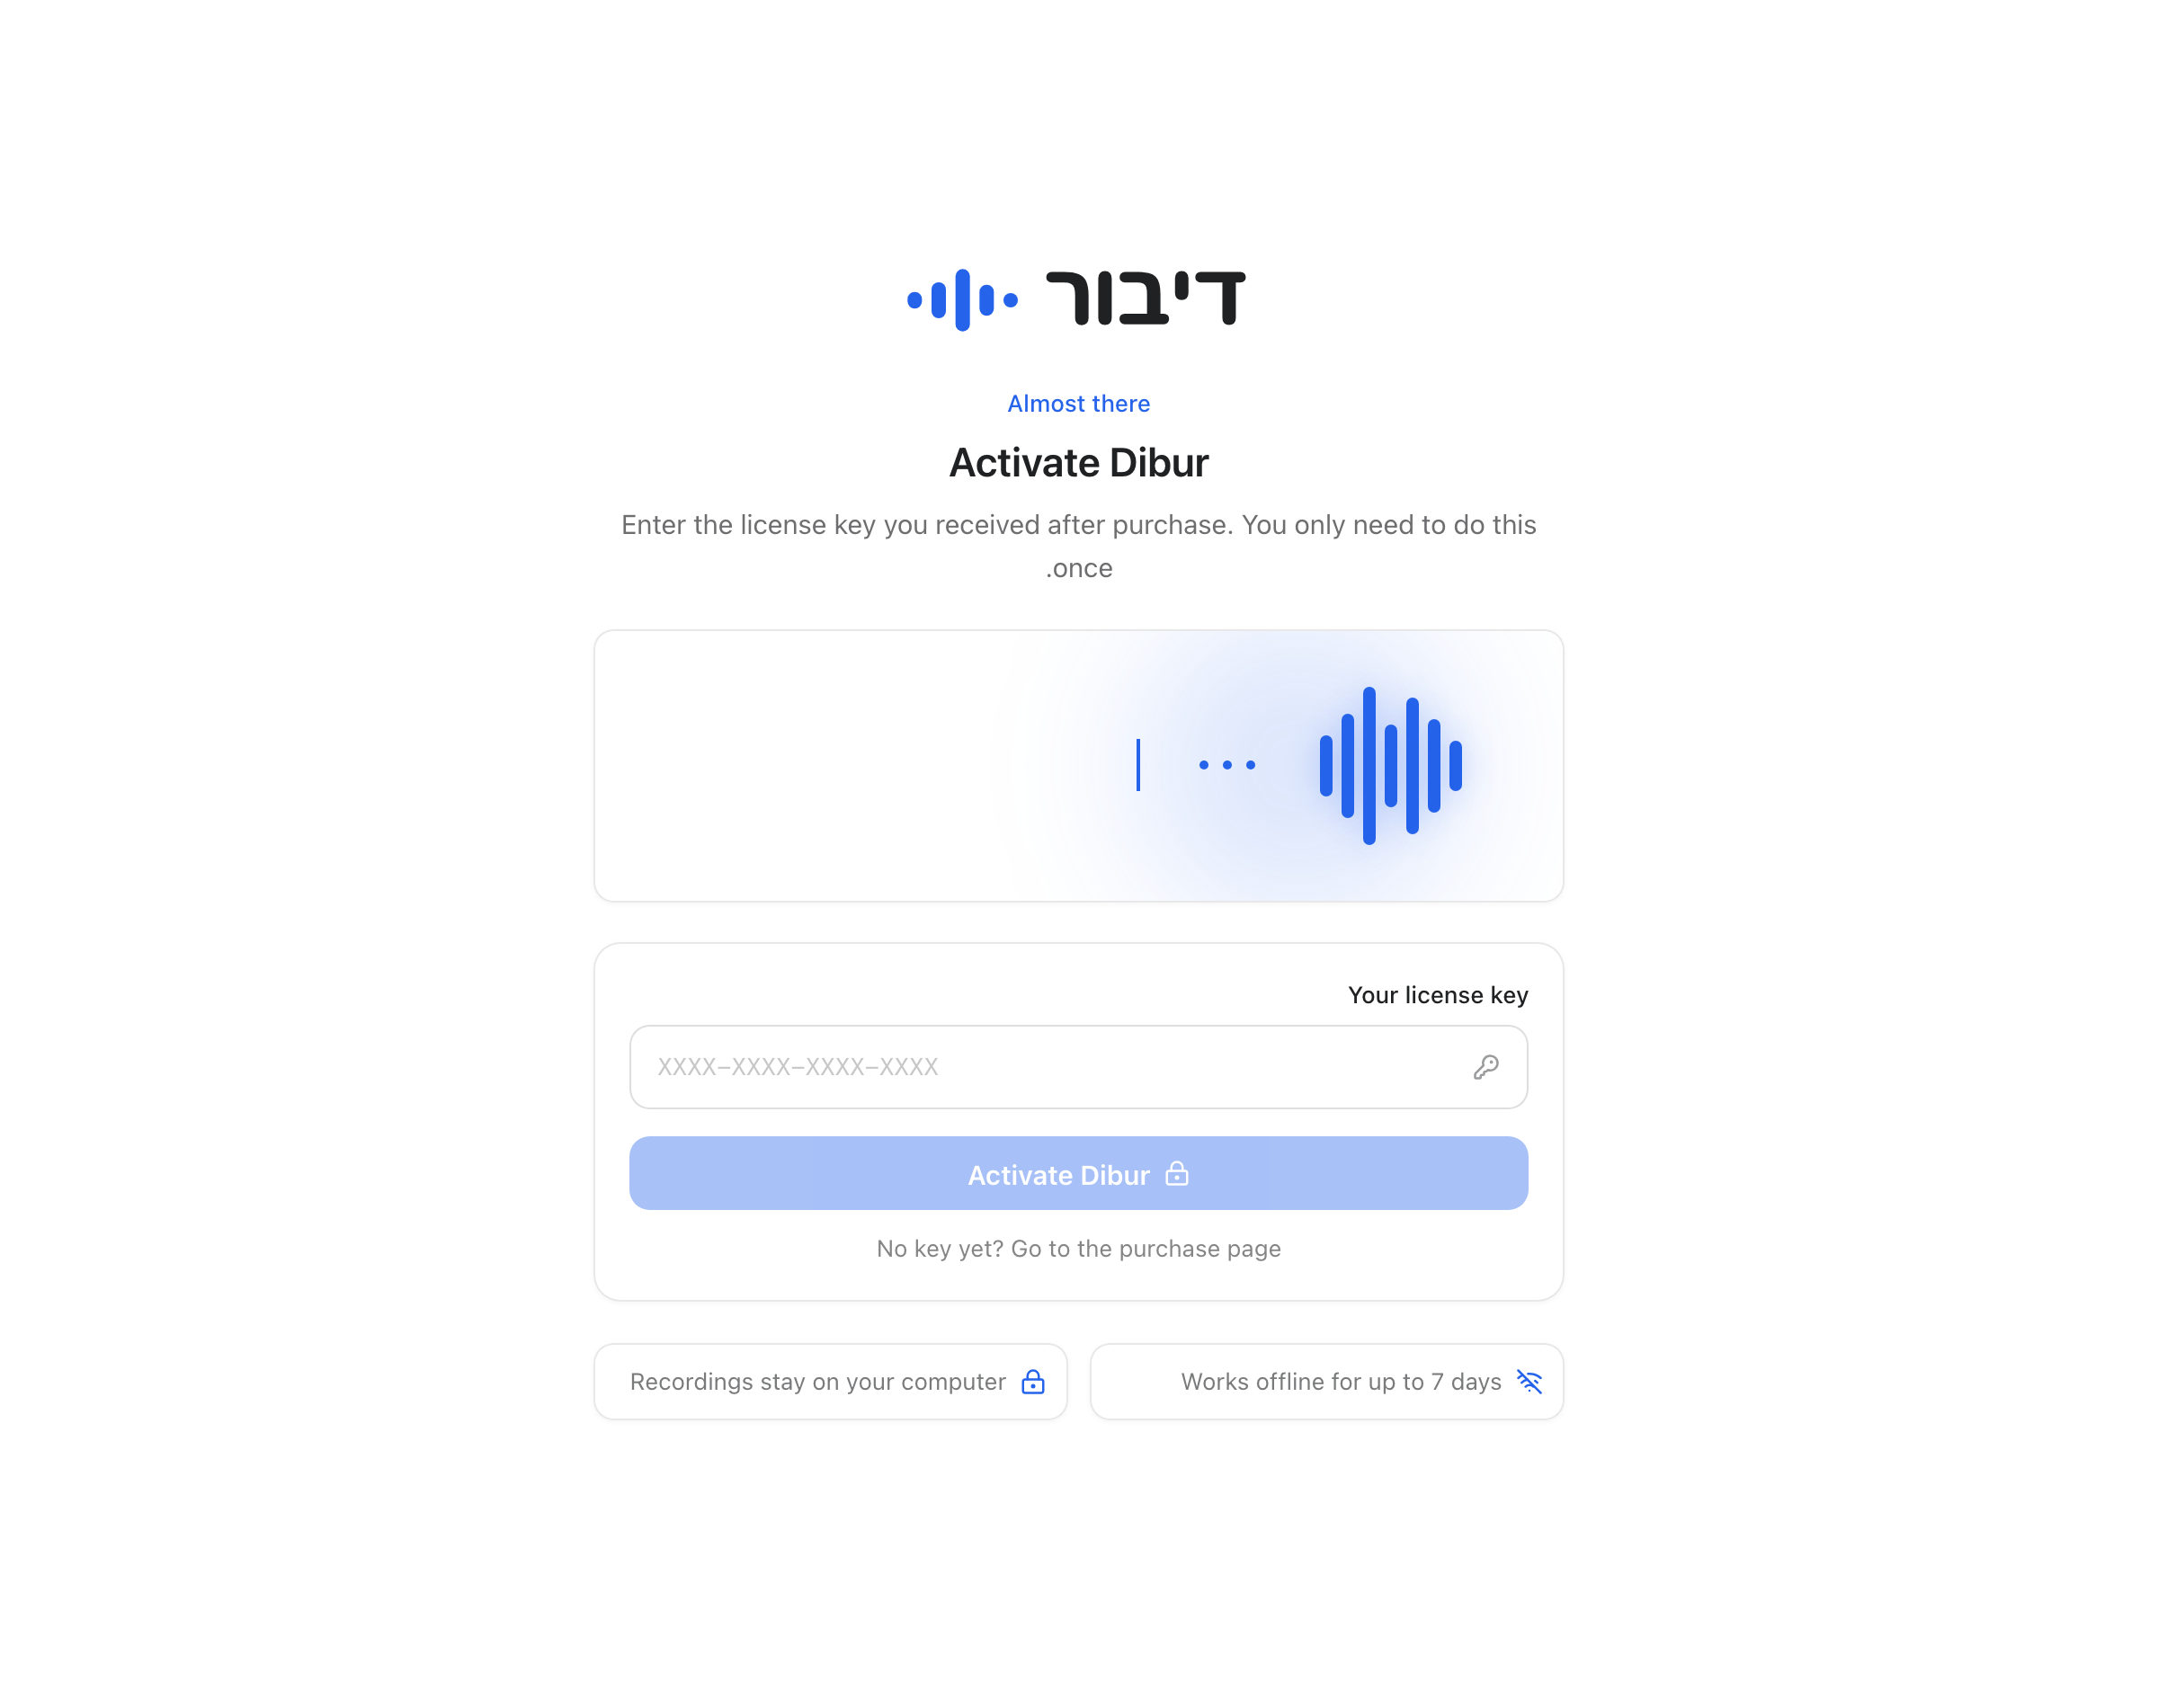
When Activate Dibur appears, paste the complete key into Your license key and choose Activate Dibur. Use the key shown in your completed access flow or purchase email. Keep the internet connection available while Dibur checks it.
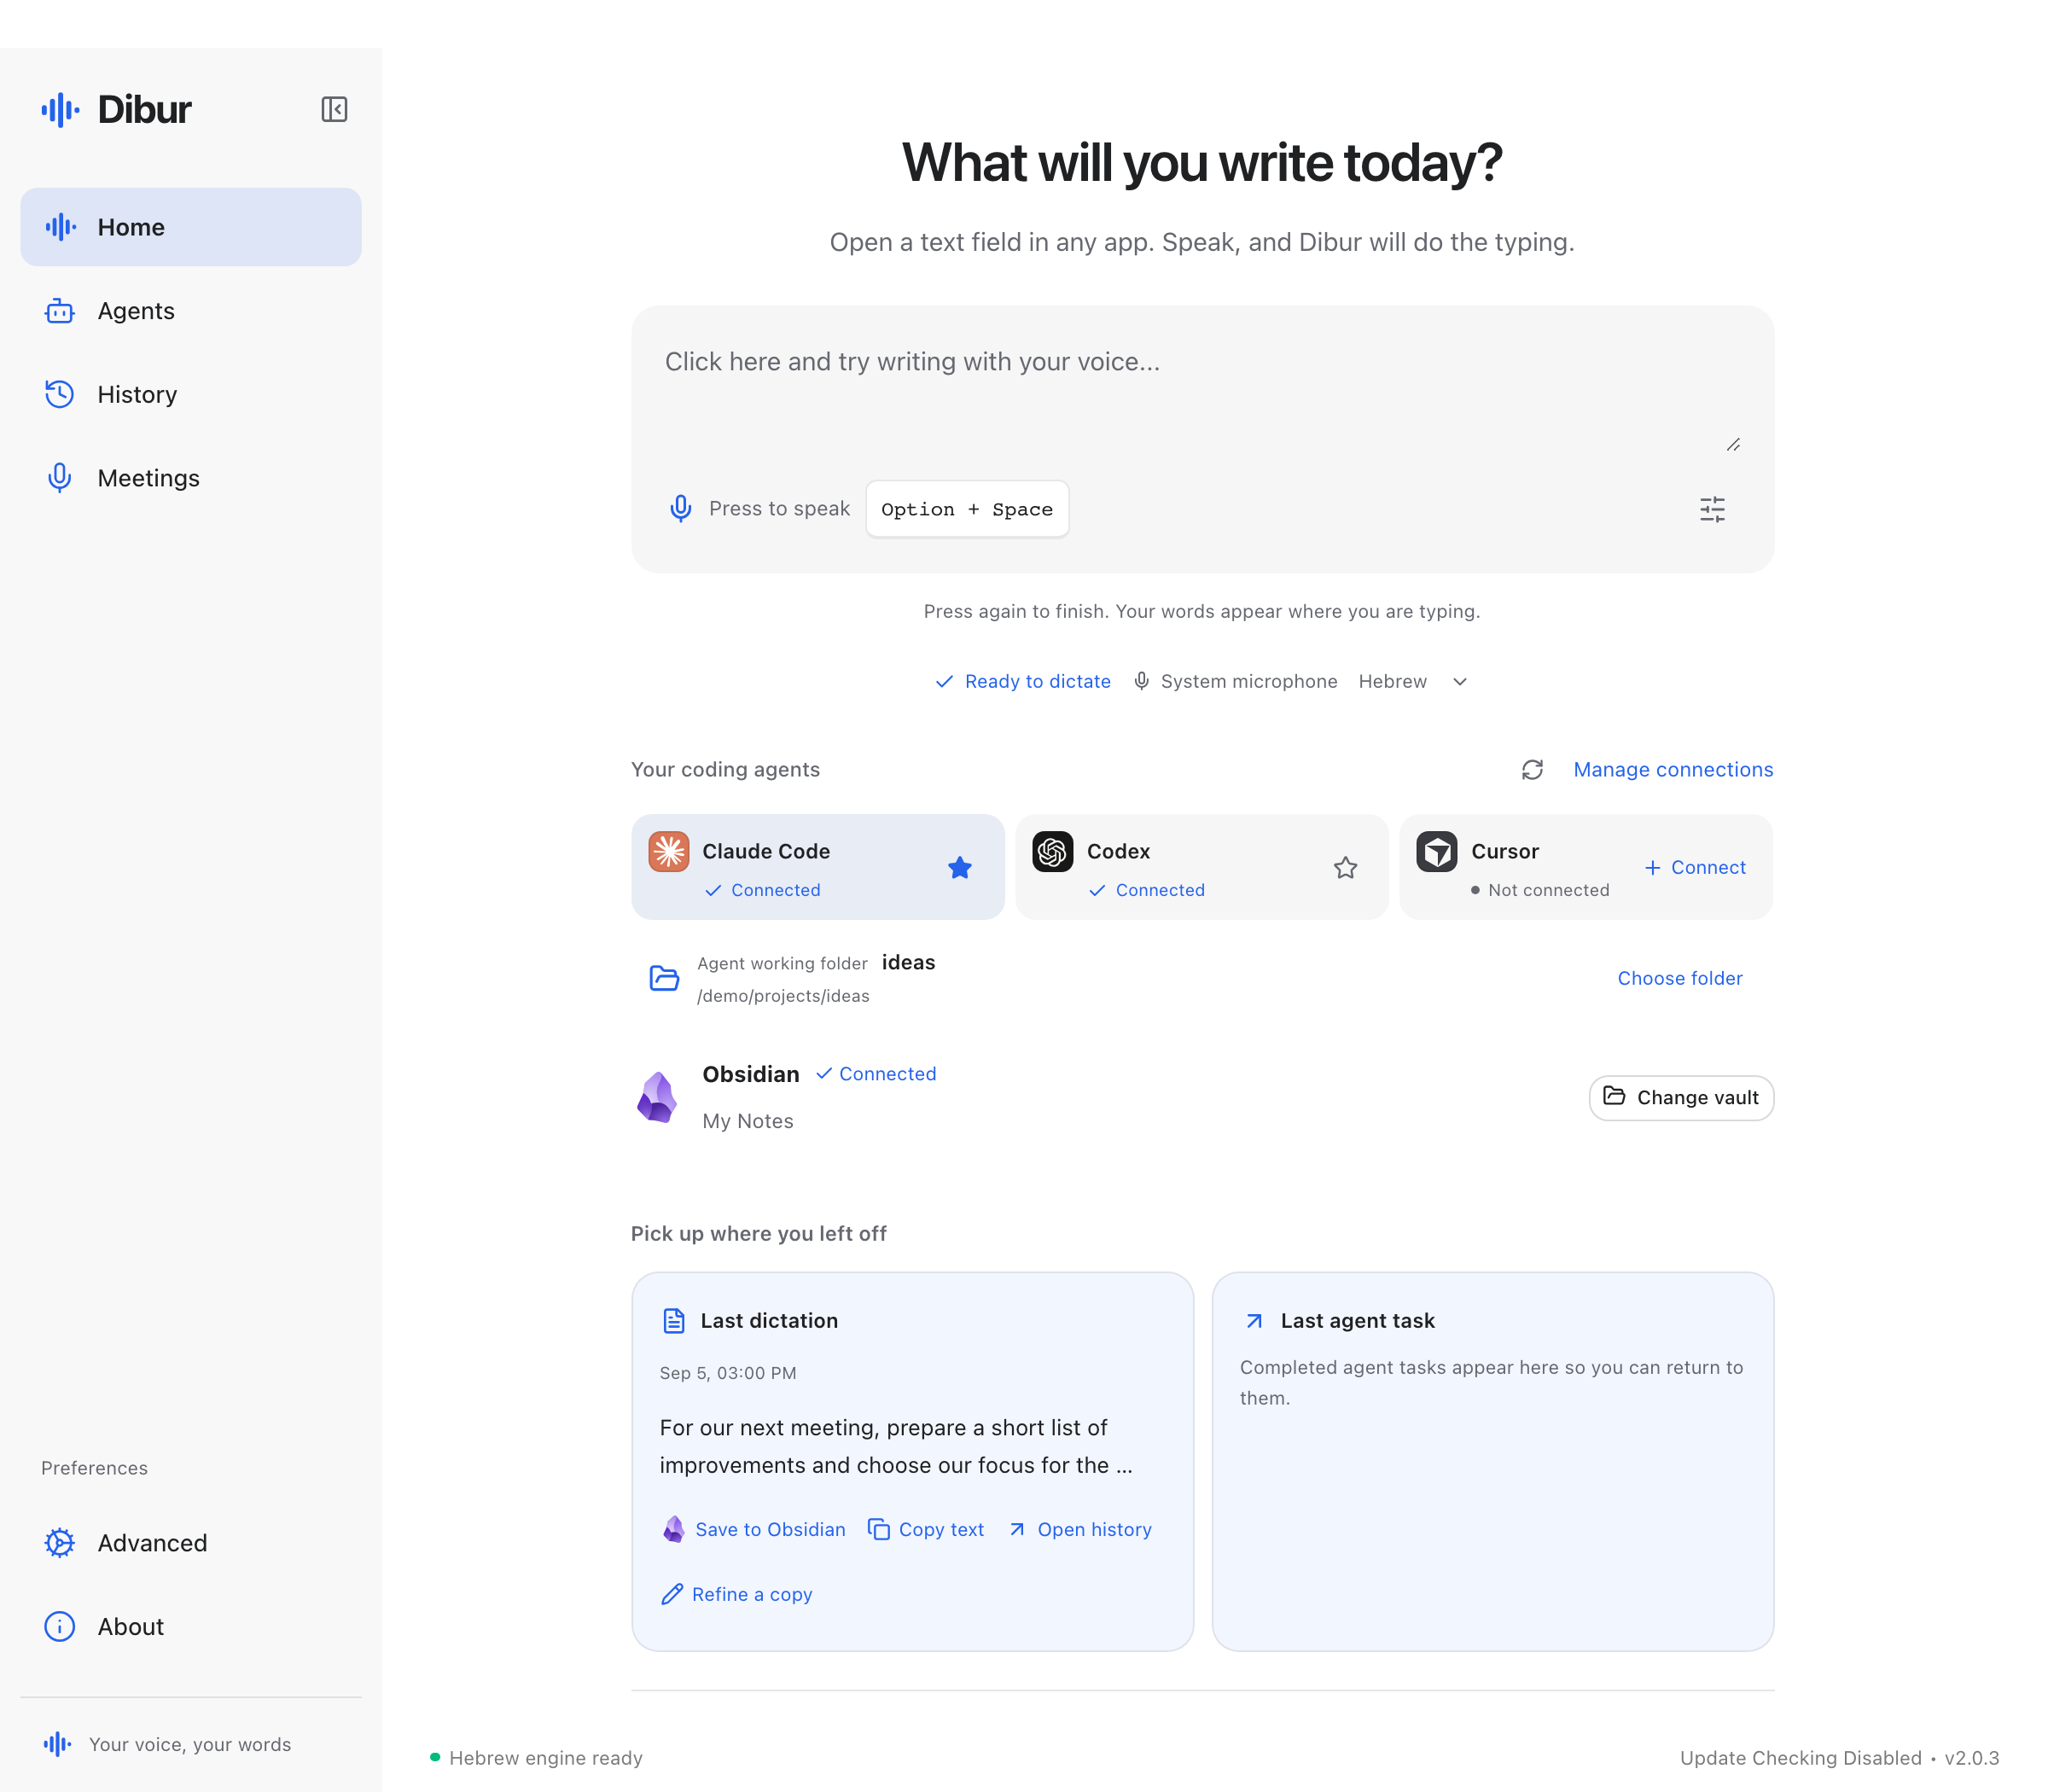
The first setup asks about permissions and your shortcut. It may also offer optional coding-agent and Obsidian connections in the updated interface. You can continue without connecting either service; they are not required to turn speech into text. Do not wait for an optional service to finish setting up before learning ordinary dictation.
Allow the microphone and, on Mac, Accessibility
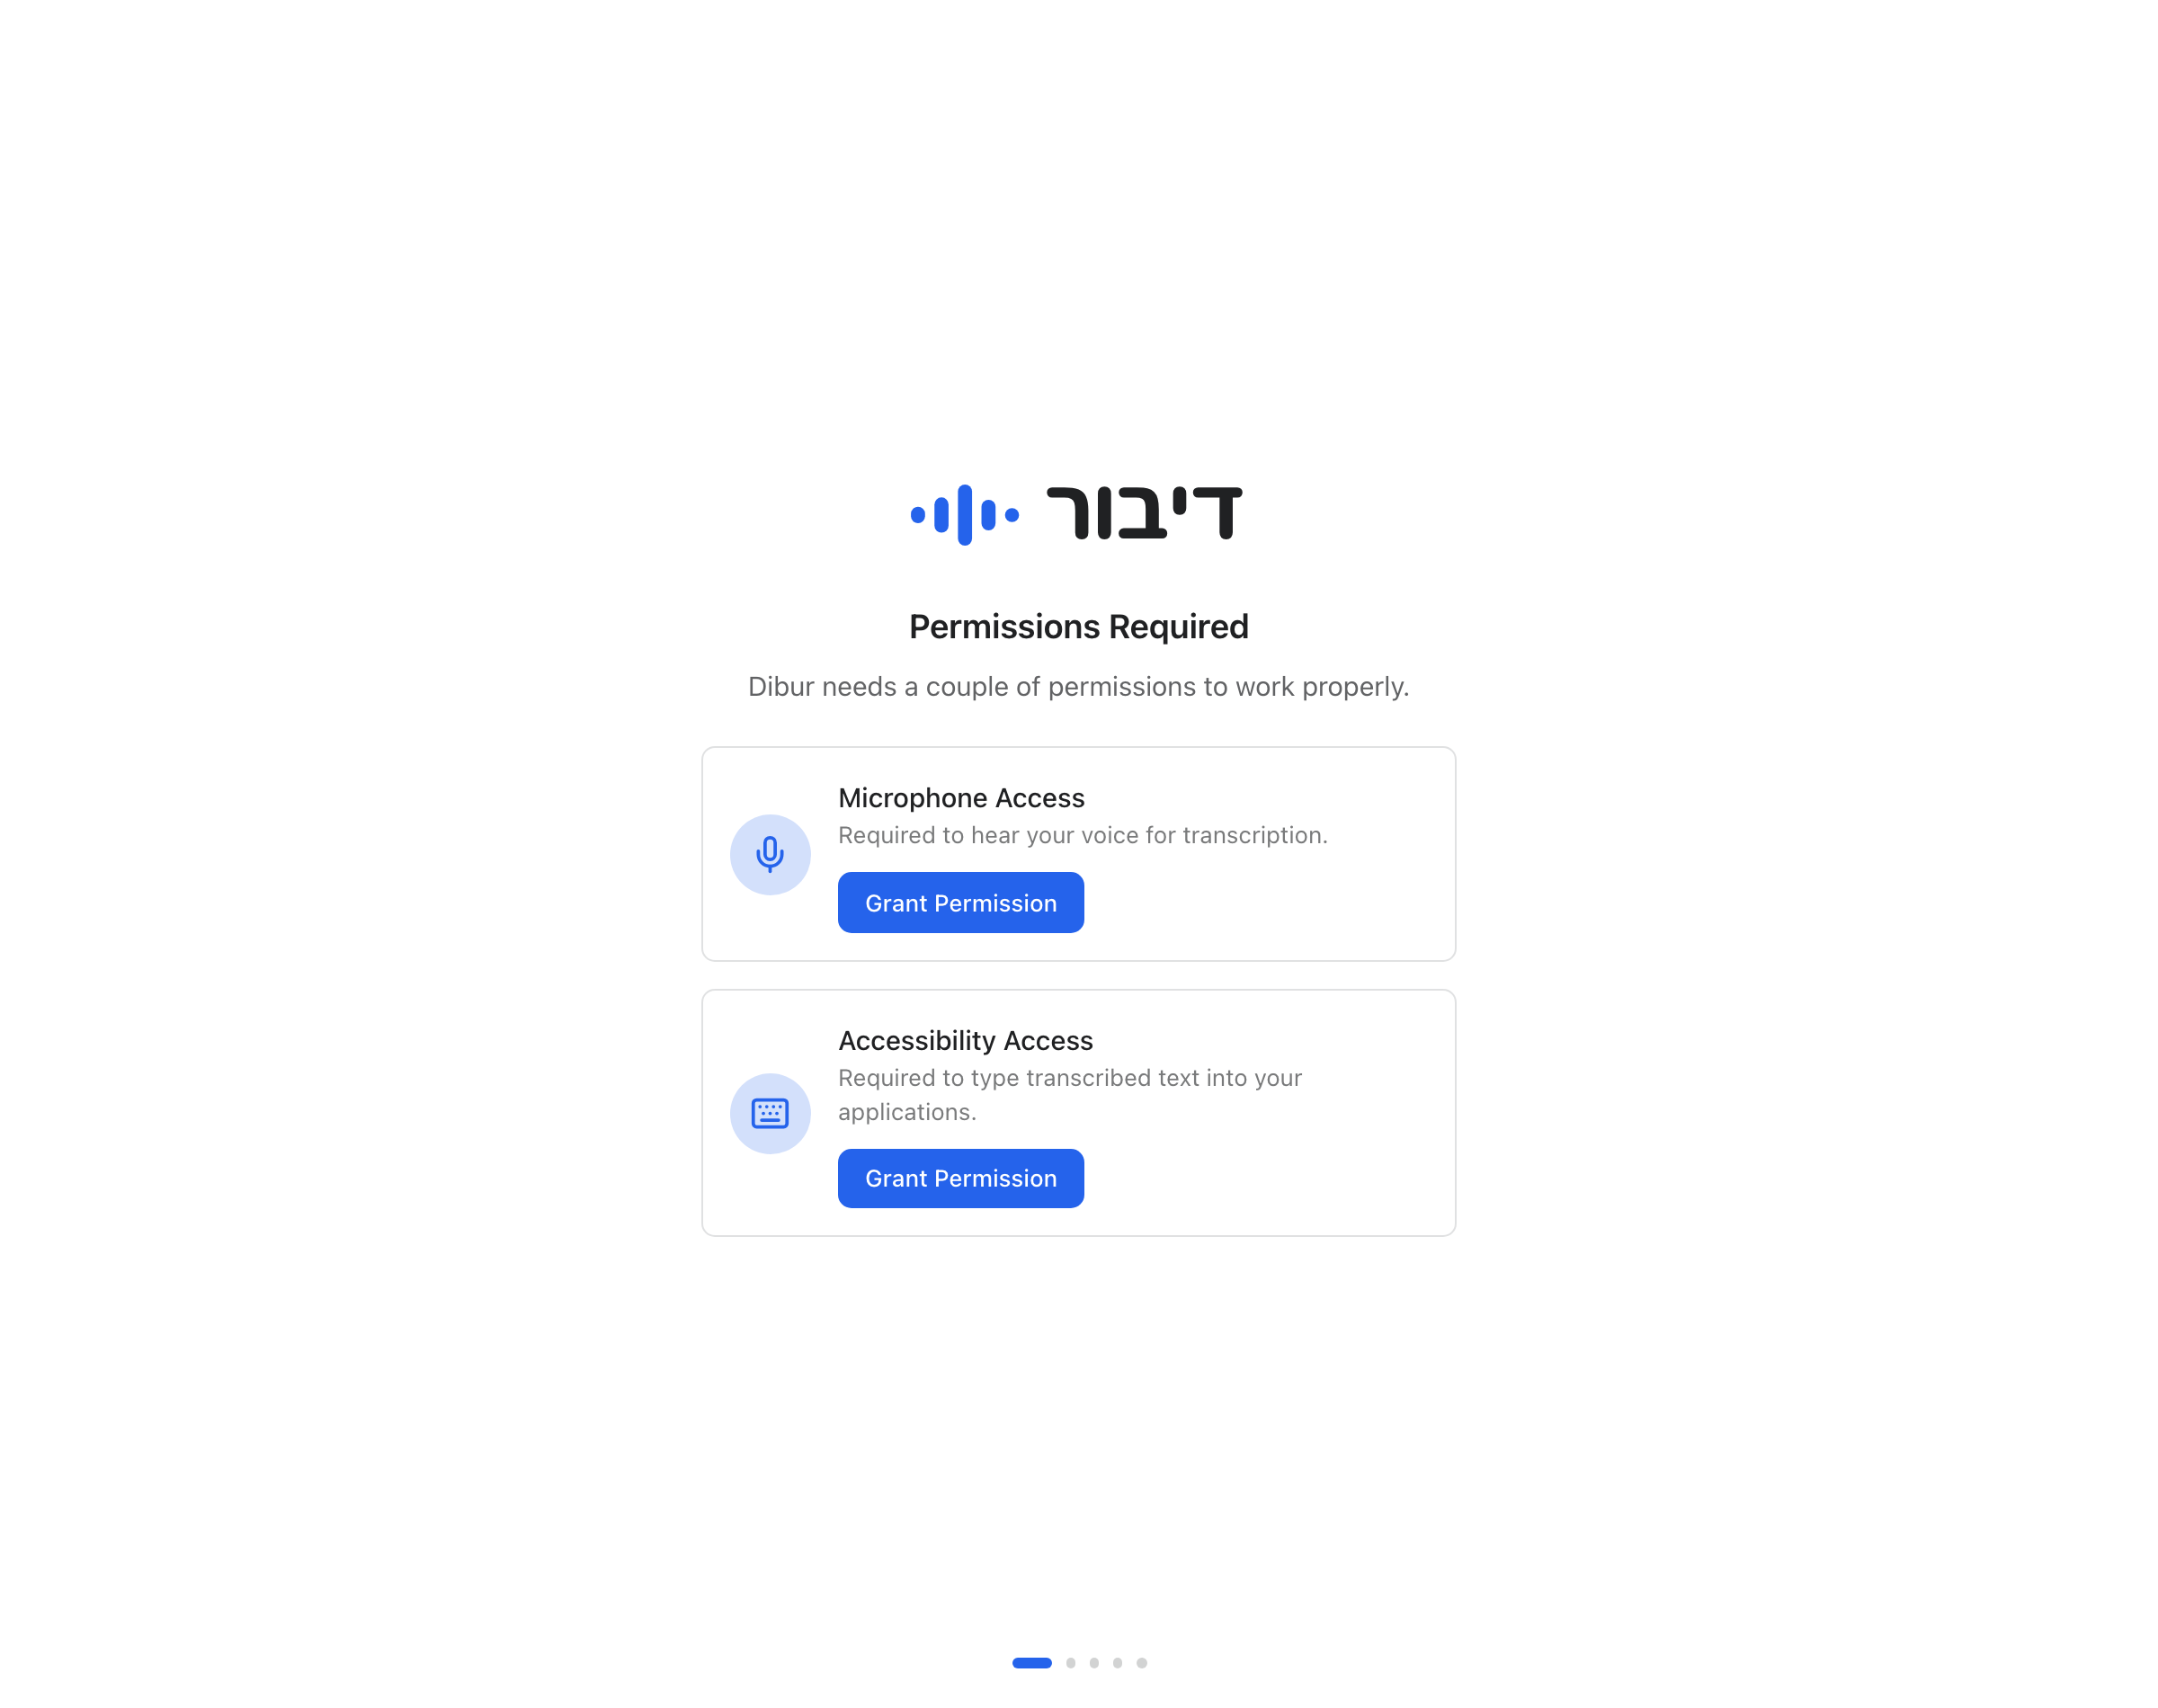
Allow Dibur to hear you
Choose Grant Permission next to Microphone Access and accept the operating-system prompt. If access was previously denied on Mac, open System Settings > Privacy & Security > Microphone and enable Dibur. Return to Dibur after changing it.
Allow typing into apps on Mac
Choose Grant Permission next to Accessibility Access. In System Settings > Privacy & Security > Accessibility, enable Dibur. This permission lets the app place transcribed text where your cursor is. It is separate from microphone access.
Check Windows desktop-app access if needed
In Windows 11, open Settings > Privacy & security > Microphone. Turn on microphone access and Let desktop apps access your microphone. Dibur is a desktop application, so looking only for a separate Microsoft Store app switch can miss the setting it needs.
Choose how you want the shortcut to work
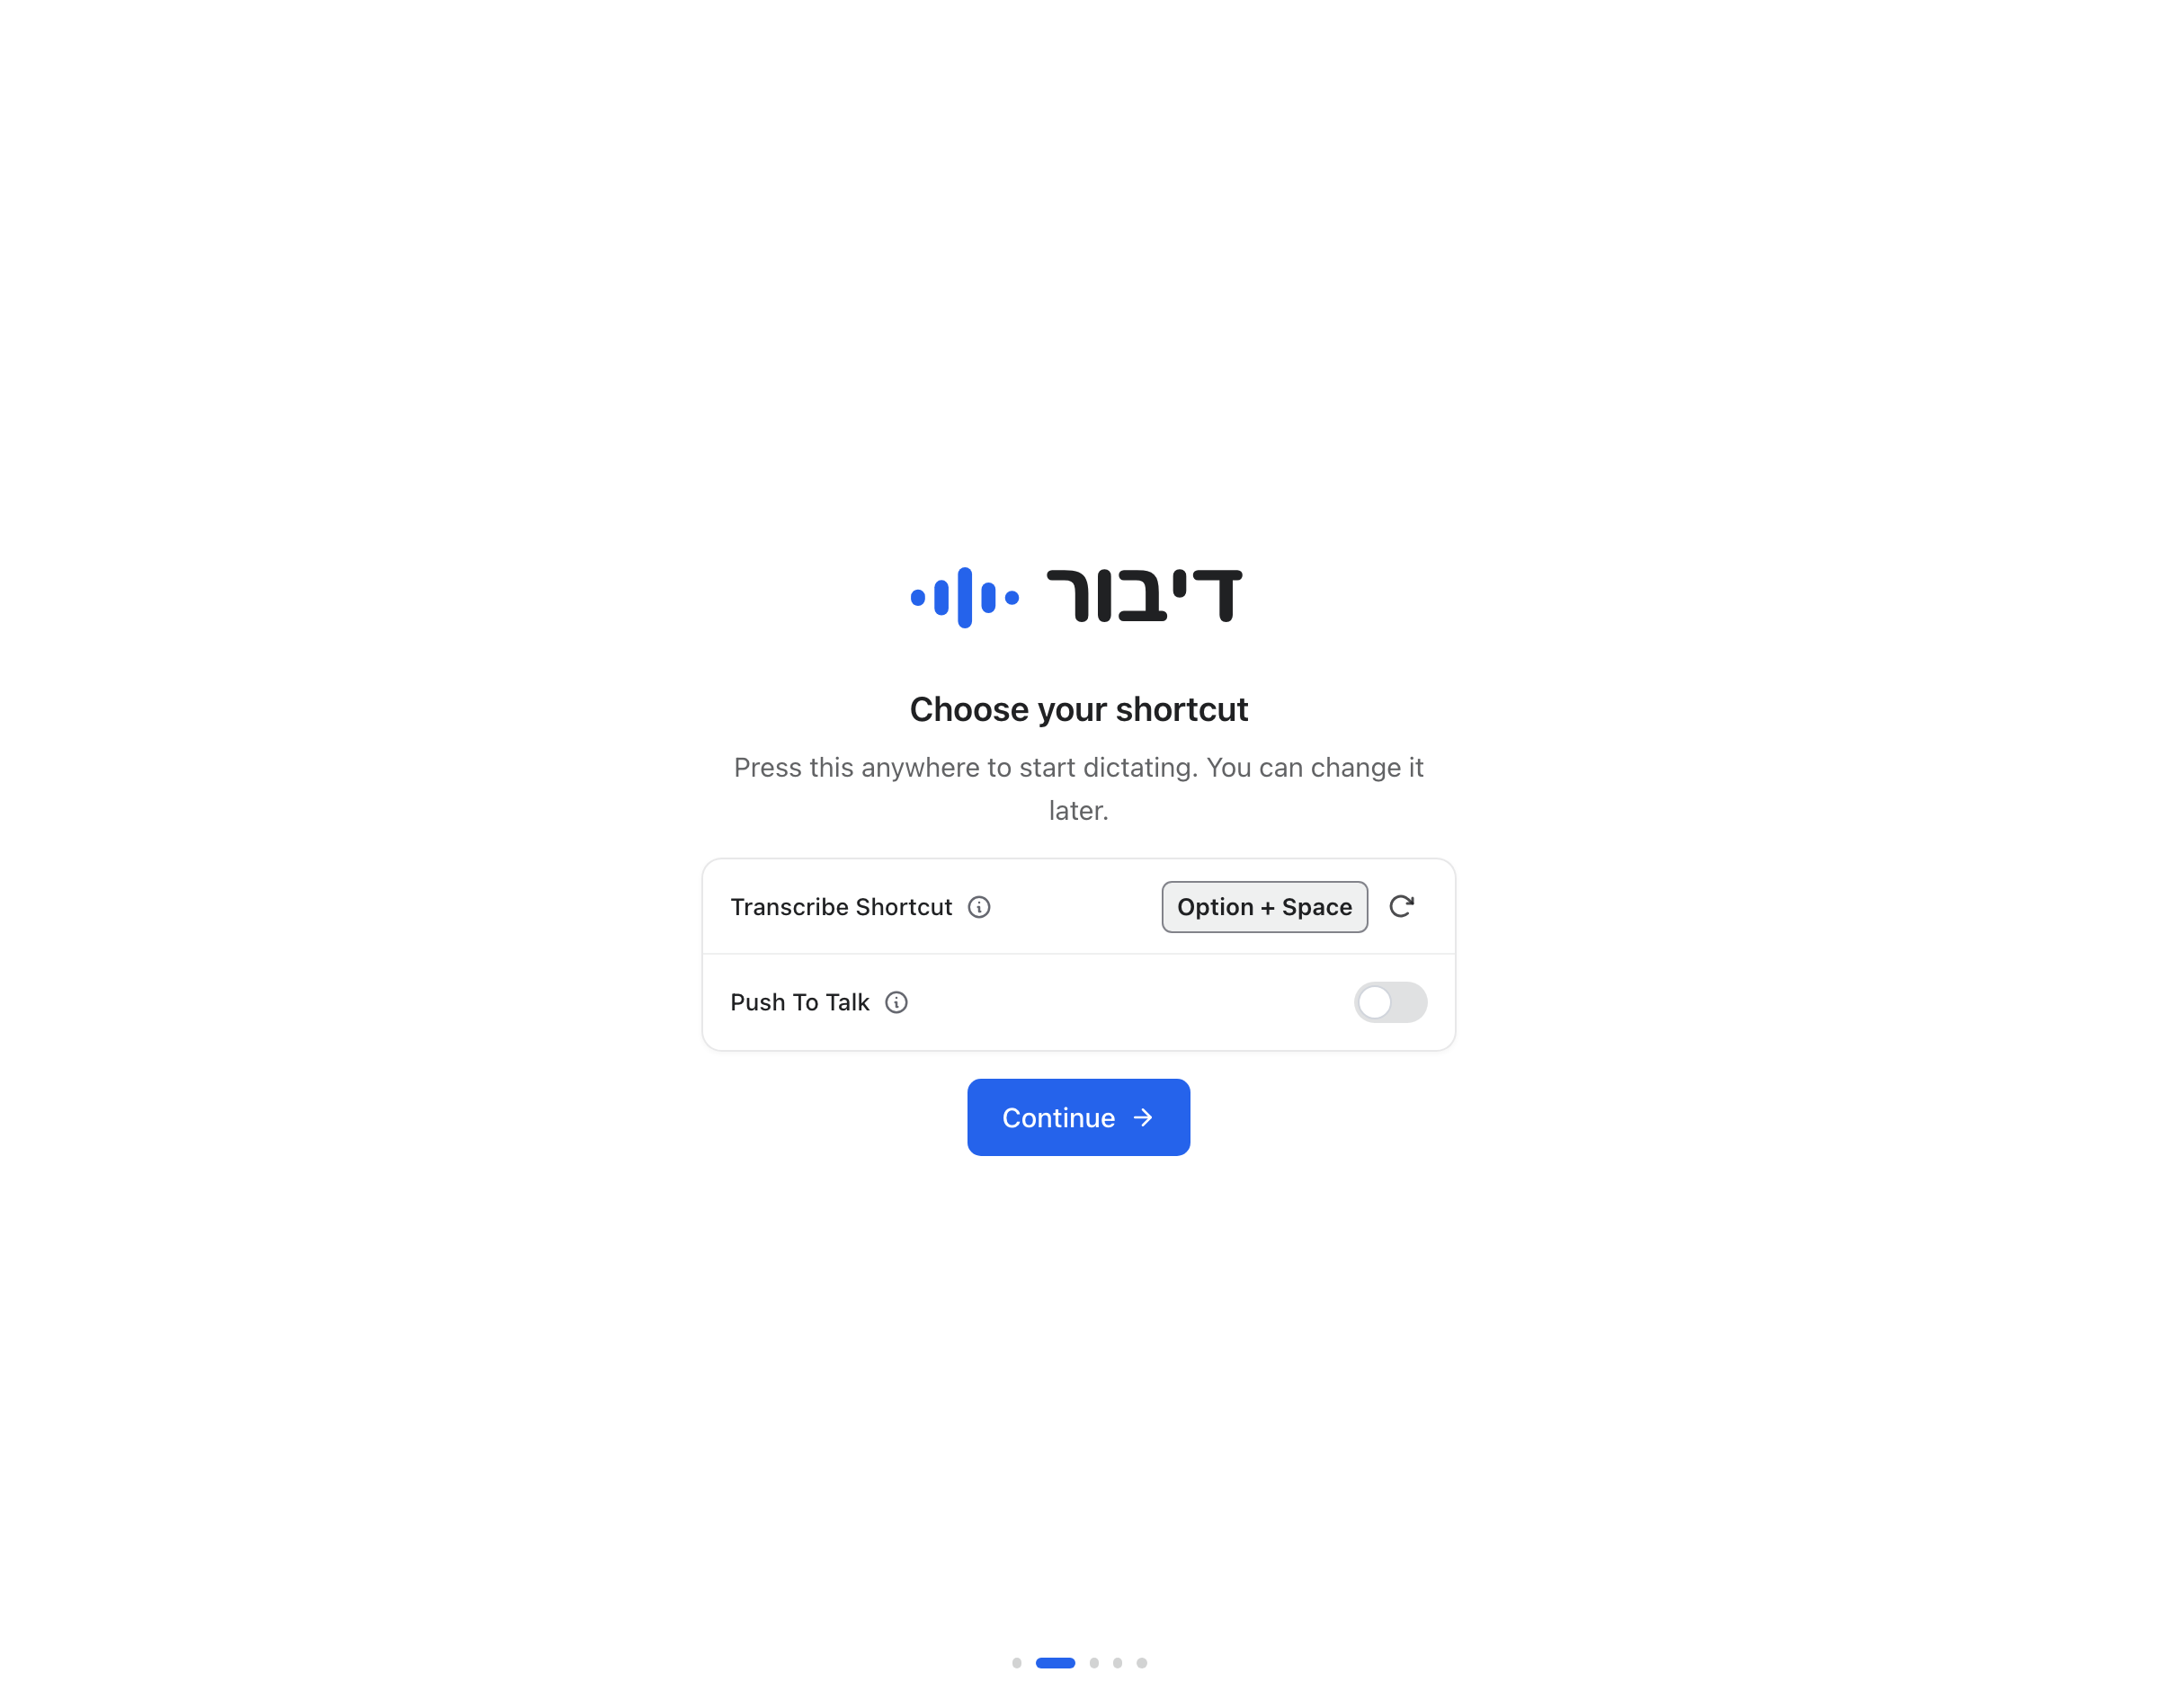
Use the exact combination displayed in Dibur. The default is Option + Space on Mac and Ctrl + Space on Windows. If you changed it earlier, your saved choice takes precedence. You can change it in the shortcut setup or the dictation preferences.
There are two recording modes. With Push To Talk enabled, hold the shortcut while speaking and release it only when finished. With it disabled, press once to start, speak, and press again to stop. A quick press and release in hold mode captures only that brief moment.
Wait for the engine, then try one short sentence
Let the initial download finish
Dibur downloads its speech engine during setup. Leave it open until the download and verification finish. The time depends on your connection and computer. If the download reports a failure, use Try again rather than assuming the keyboard shortcut is broken.
Put the cursor where text should appear
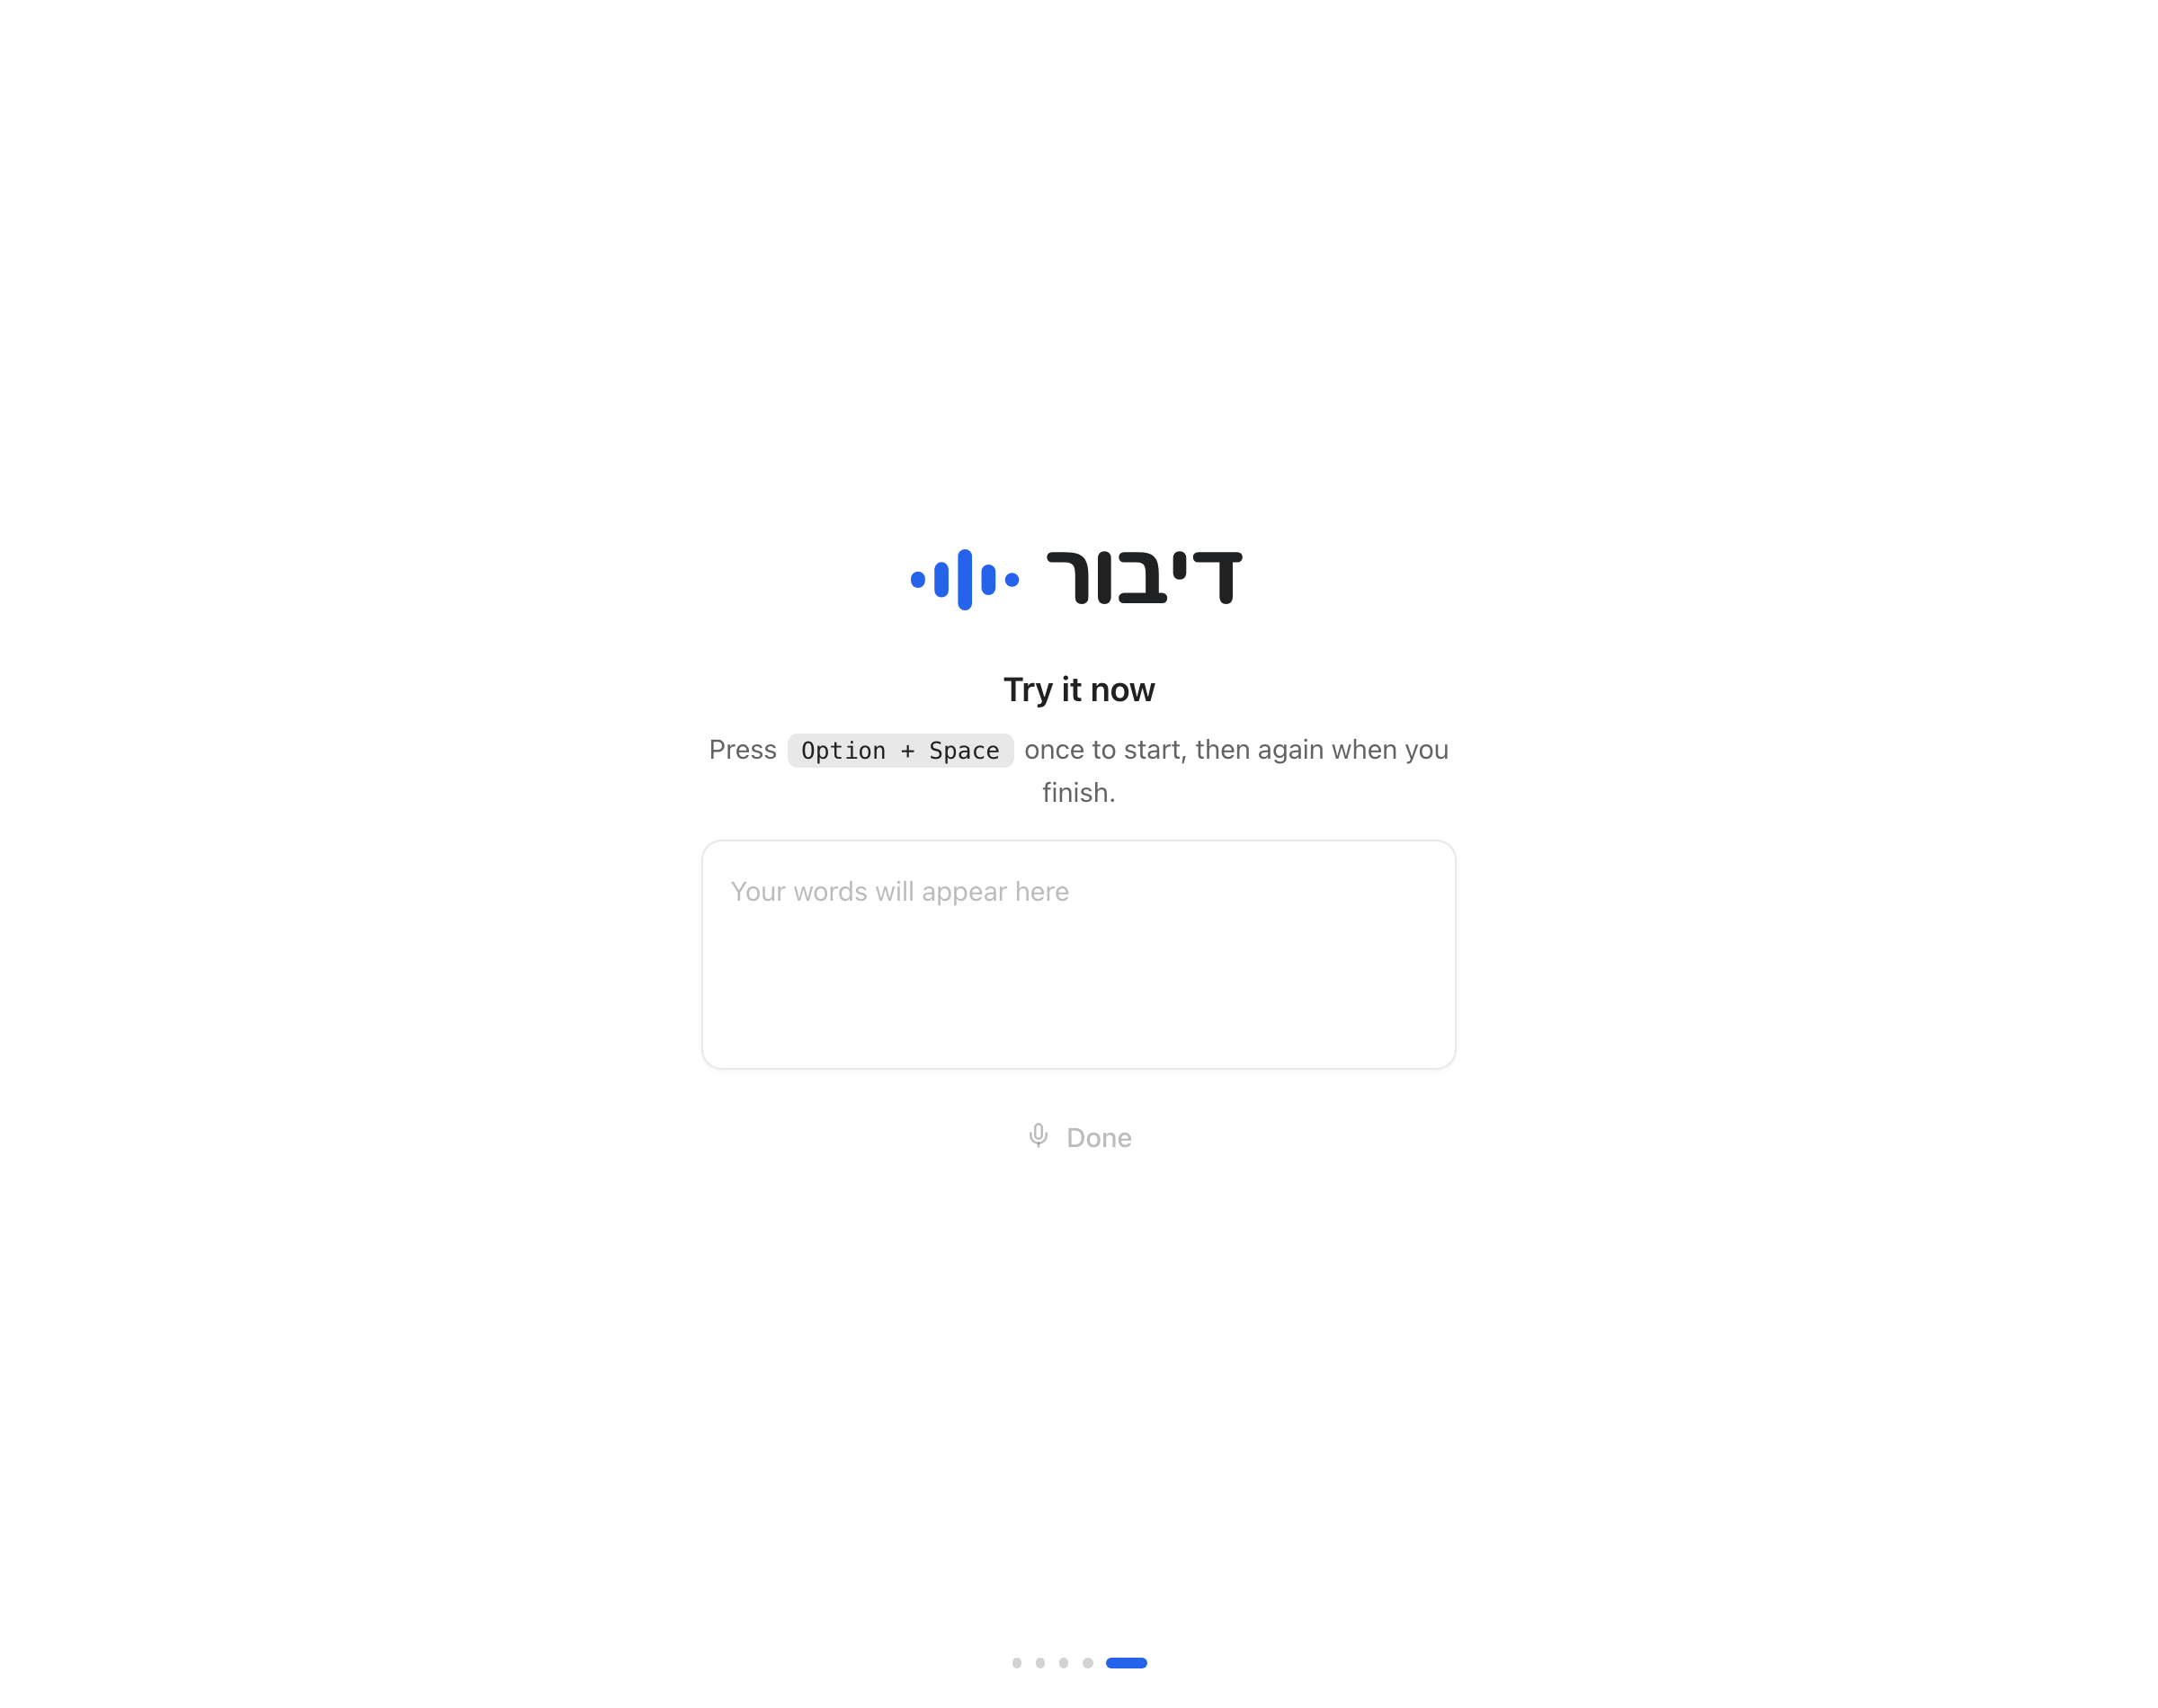
On Try it now, click the practice field. In the updated home, you can use the voice-typing field. If your version does not have it, open a blank note in Notes or Notepad and click inside the document. An empty area of the app window cannot receive text.
Speak, finish, and wait for text
Use your selected recording mode and say a short sentence, such as “Please remind me to review the draft tomorrow.” After you release the keys or press again, allow processing to finish. Check the words before copying or sending them elsewhere.
How to know it worked
- A short spoken sentence appears in the field you selected.
- The recording ends using the hold or toggle behavior you chose.
- A second test works in a blank Notes or Notepad document.
Stuck? Start here
The shortcut seems to do nothing.
Check that the speech engine is ready, then check the exact saved shortcut and recording mode. In hold mode, keep the keys down while speaking. On Mac, verify both Microphone and Accessibility permissions. If another app uses the same combination, choose a different shortcut in Dibur.
Recording happens, but no text appears.
Click inside an editable field and try a clearly spoken sentence. Check the selected microphone, especially after connecting a headset or closing a laptop. A silent or very short recording can produce no text. The updated interface explains this with No clear speech detected.
I cannot activate or finish the download.
Keep the internet connection available, check the complete license key, and use the retry control for a failed engine download. If the license service cannot be reached, wait and retry. An optional agent or Obsidian connection will not repair an activation problem.
Sources and updates
Steps were checked against Dibur’s source and official documentation. Screenshots show the application with demonstration data and no personal information.